Go provides a way to write efficient concurrent programs in a C-like language. Eleanor McHugh shares a "Hello, world!" tutorial.
It’s a tradition in programming books to start with a canonical ‘Hello World’ example and whilst I’ve never felt the usual presentation is particularly enlightening, I know we can spice things up a little to provide useful insights into how we write Go programs.
Let’s begin with the simplest Go program that will output text to the console (Listing 1).
 1 package main
 2 func main() {
 3   println("hello world")
 4 }
|
| Listing 1 |
The first thing to note is that every Go source file belongs to a package, with the main package defining an executable program whilst all other packages represent libraries.
1 package main
For the main package to be executable it needs to include a
main()
function, which will be called following program initialisation.
2 func main() {
Notice that unlike C/C++, the
main()
function neither takes parameters nor has a return value. Whenever a program should interact with command-line parameters or return a value on termination, these tasks are handled using functions in the standard package library. We’ll examine command-line parameters when developing
Echo
.
Finally let’s look at our payload.
3 println("hello world")
The
println()
function is one of a small set of built-in generic functions defined in the language specification and which in this case is usually used to assist debugging, whilst
"hello world"
is a value comprising an immutable string of characters in utf-8 format.
We can now run our program from the command-line (Terminal on MacOS X or Command Prompt on Windows) with the command
  $ go run 01.go
  hello world
Packages
Now we’re going to apply a technique which I plan to use throughout my book by taking this simple task and developing increasingly complex ways of expressing it in Go. This runs counter to how experienced programmers usually develop code but I feel this makes for a very effective way to introduce features of Go in rapid succession and have used it with some success during presentations and workshops.
There are a number of ways we can artificially complicate our hello world example and by the time we’ve finished I hope to have demonstrated all the features you can expect to see in the global scope of a Go package. Our first change is to remove the built-in
println()
function and replace it with something intended for production code (see Listing 2).
 1 package main
 2 import "fmt"
 3 func main() {
 4   fmt.Println("hello world")
 5 }
|
| Listing 2 |
The structure of our program remains essentially the same, but we’ve introduced two new features.
2 import "fmt"
The
import
statement is a reference to the
fmt
package, one of many packages defined in Go’s standard runtime library. A
package
is a library which provides a group of related functions and data types we can use in our programs. In this case,
fmt
provides functions and types associated with formatting text for printing and displaying it on a console or in the command shell.
4 fmt.Println("hello world")
One of the functions provided by
fmt
is
Println()
, which takes one or more parameters and prints them to the console with a carriage return appended. Go assumes that any identifier starting with a capital letter is part of the public interface of a package whilst identifiers starting with any other letter or symbol are private to the package.
In production code we might choose to simplify matters a little by importing the
fmt
namespace into the namespace of the current source file, which requires we change our
import
statement.
2 import . "fmt"
And this consequently allows the explicit package reference to be removed from the
Println()
function call.
4 Println("hello world")
In this case we notice little gain; however, in later examples we’ll use this feature extensively to keep our code legible (Listing 3).
 1 package main
 2 import . "fmt"
 3 func main() {
 4   Println("hello world")
 5 }
|
| Listing 3 |
One aspect of imports that we’ve not yet looked at is Go’s built-in support for code hosted on a variety of popular social code-sharing sites such as GitHub and Google Code. Don’t worry, we’ll get to this in later chapters of my book.
Constants
A significant proportion of Go codebases feature identifiers whose values will not change during the runtime execution of a program and our ‘Hello World’ example is no different (Listing 4), so we’re going to factor these out.
 1 package main
 2 import . "fmt"
 3 const Hello = "hello"
 4 const world = "world"
 5 func main() {
 6   Println(Hello, world)
 7 }
|
| Listing 4 |
Here we’ve introduced two constants:
Hello
and
world
. Each identifier is assigned its value during compilation, and that value cannot be changed at runtime. As the identifier
Hello
starts with a capital letter the associated constant is visible to other packages – though this isn’t relevant in the context of a
main
package – whilst the identifier
world
starts with a lowercase letter and is only accessible within the
main
package.
We don’t need to specify the type of these constants as the Go compiler identifies them both as strings.
Another neat trick in Go’s armoury is multiple assignment so let’s see how this looks (see Listing 5).
 1 package main
 2 import . "fmt"
 3 const Hello, world = "hello", "world"
 4 func main() {
 5   Println(Hello, world)
 6 }
|
| Listing 5 |
This is compact, but I personally find it too cluttered and prefer the more general form (Listing 6).
 1 package main
 2 import . "fmt"
 3 const (
 4   Hello = "hello"
 5   world =  "world"
 6 )
 7 func main() {
 8   Println(Hello, world)
 9 }
|
| Listing 6 |
Because the
Println()
function is
variadic
(i.e. can take a varible number of parameters) we can pass it both constants and it will print them on the same line, separate by whitespace.
fmt
also provides the
Printf()
function which gives precise control over how its parameters are displayed using a format specifier which will be familiar to seasoned C/C++ programmers.
8 Printf("%v %v\n", Hello, world)
fmt
defines a number of % replacement terms which can be used to determine how a particular parameter will be displayed. Of these
%v
is the most generally used as it allows the formatting to be specified by the type of the parameter. We’ll discuss this in depth when we look at user-defined types, but in this case it will simply replace a
%v
with the corresponding string.
When parsing strings the Go compiler recognises a number of
escape sequences
which are available to mark tabs, new lines and specific unicode characters. In this case we use
\n
to mark a new line (Listing 7).
 1 package main
 2 import . "fmt"
 3 const (
 4   Hello = "hello"
 5   world =  "world"
 6 )
 7 func main() {
 8   Printf("%v %v\n", Hello, world)
 9 }
|
| Listing 7 |
Variables
Constants are useful for referring to values which shouldn’t change at runtime; however, most of the time when we’re referencing values in an imperative language like Go we need the freedom to change these values. We associate values which will change with variables. What follows is a simple variation of our Hello World program which allows the value of
world
to be changed at runtime by creating a new value and assigning it to the
world
variable (Listing 8).
 1 package main
 2 import . "fmt"
 3 const Hello = "hello"
 4 var world = "world"
 5 func main() {
 6   world += "!"
 7   Println(Hello, world)
 8 }
|
| Listing 8 |
There are two important changes here. Firstly we’ve introduced syntax for declaring a variable and assigning a value to it. Once more Go’s ability to infer type allows us assign a
string
value to the variable
world
without explicitly specifying the type.
4 var world = "world"
However if we wish to be more explicit we can be.
4 var world string = "world"
Having defined
world
as a variable in the global scope we can modify its value in
main()
, and in this case we choose to append an exclamation mark. Strings in Go are immutable values so following the assignment
world
will reference a new value.
6 world += "!"
To add some extra interest, I’ve chosen to use an augmented assignment operator. These are a syntactic convenience popular in many languages which allow the value contained in a variable to be modified and the resulting value then assigned to the same variable.
I don’t intend to expend much effort discussing scope in Go. The point of my book is to experiment and learn by playing with code, referring to the comprehensive language specification available from Google when you need to know the technicalities of a given point. However, to illustrate the difference between global and local scope we’ll modify this program further (see Listing 9).
 1 package main
 2 import . "fmt"
 3
 4 const Hello = "hello"
 5 var world = "world"
 6
 7 func main() {
 8   world := world + "!"
 9   Println(Hello, world)
10 }
|
| Listing 9 |
Here we’ve introduced a new
local
variable
world
within
main()
which takes its value from an operation concatenating the value of the
global
world
variable with an exclamation mark. Within
main()
, any subsequent reference to
world
will always access the
local
version of the variable without affecting the
global
world
variable. This is known as
shadowing
.
The
:=
operator marks an assignment declaration in which the type of the expression is inferred from the type of the value being assigned. If we chose to declare the local variable separately from the assignment we’d have to give it a different name to avoid a compilation error (Listing 10).
 1 package main
 2 import . "fmt"
 3 const Hello = "hello"
 4 var world = "world"
 5 func main() {
 6   var w string
 7   w = world + "!"
 8   Println(Hello, w)
 9 }
|
| Listing 10 |
Another thing to note in this example is that when
w
is declared it’s also initialised to the zero value, which in the case of
string
happens to be
""
. This is a
string
containing no characters.
In fact, all variables in Go are initialised to the zero value for their type when they’re declared and this eliminates an entire category of initialisation bugs which could otherwise be difficult to identify.
Functions
Having looked at how to reference values in Go and how to use the
Println()
function to display them, it’s only natural to wonder how we can implement our own functions. Obviously we’ve already implemented
main()
which hints at what’s involved, but
main()
is something of a special case as it exist to allow a Go program to execute and it neither requires any parameters nor produces any values to be used elsewhere in the program. (See Listing 11.)
 1 package main
 2 import . "fmt"
 3 const Hello = "hello"
 4 func main() {
 5   Println(Hello, world())
 6 }
 7 func world() string {
 8   return "world"
 9 }
|
| Listing 11 |
In this example we’ve introduced
world()
, a function which to the outside world has the same operational purpose as the variable of the same name that we used in the previous section.
The empty brackets
()
indicate that there are no parameters passed into the function when it’s called, whilst
string
tells us that a single value is returned and it’s of type
string
. Anywhere that a valid Go program would expect a
string
value we can instead place a call to
world()
and the value returned will satisfy the compiler. The use of
return
is required by the language specification whenever a function specifies return values, and in this case it tells the compiler that the value of
world()
is the string
"world"
.
Go is unusual in that its syntax allows a function to return more than one value and as such each function takes two sets of
()
, the first for parameters and the second for results. We could therefore write our function in long form as
  7 func world() (string) {
  8   return "world"
  9 }
In this next example we use a somewhat richer function signature, passing the parameter
name
which is a string value into the function
message()
, and assigning the function’s return value to
message
which is a variable declared and available throughout the function. (See Listing 12.)
 1 package main
 2 import "fmt"
 3 func main() {
 4   fmt.Println(message("world"))
 5 }
 6 func message(name string) (message string) {
 7   message = fmt.Sprintf("hello %v", name)
 8   return message
 9 }
|
| Listing 12 |
As with
world()
, the
message()
function can be used anywhere that the Go compiler expects to find a string value. However, where
world()
simply returned a predetermined value,
message()
performs a calculation using the
Sprintf()
function and returns its result.
Sprintf()
is similar to
Printf()
which we met when discussing constants, only rather than create a string according to a format and displaying it in the terminal it instead returns this string as a value which we can assign to a variable or use as a parameter in another function call such as
Println()
.
Because we’ve explicitly named the return value, we don’t need to reference it in the return statement as each of the named return values is implied. (See Listing 13.)
 1 package main
 2 import . "fmt"
 3 func main() {
 4   Println(message("world"))
 5 }
 6 func message(name string) (message string) {
 7   message = Sprintf("hello %v", name)
 8   return
 9 }
|
| Listing 13 |
If we compare the
main()
and
message()
functions (Listing 14), we notice that
main()
doesn’t have a
return
statement. Likewise if we define our own functions without return values we can omit the
return
statement, though later we’ll meet examples where we’d still use a
return
statement to prematurely exit a function.
 1 package main
 2 import . "fmt"
 3 func main() {
 4   greet("world")
 5 }
 6 func greet(name string) {
 7   Println("hello", name)
 8 }
|
| Listing 14 |
In Listing 15, we’ll see what a function which uses multiple return values looks like.
 1 package main
 2 import . "fmt"
 3 func main() {
 4   Println(message())
 5 }
 6 func message() (string, string) {
 7   return "hello", "world"
 8 }
|
| Listing 15 |
Because
message()
returns two values we can use it in any context where at least two parameters can be consumed.
Println()
happens to be a
variadic
function, which we’ll explain in a moment, and takes zero or more parameters so it happily consumes both of the values
message()
returns.
For our final example (Listing 16) we’re going to implement our own variadic function.
 1 package main
 2 import . "fmt"
 3 func main() {
 4   print("Hello", "world")
 5 }
 6 func print(v ...interface{}) {
 7   Println(v...)
 8 }
|
| Listing 16 |
We have three interesting things going on here which need explaining. Firstly I’ve introduced a new type,
interface{}
, which acts as a proxy for any other type in a Go program. We’ll discuss the details of this shortly but for now it’s enough to know that anywhere an
interface{}
is accepted we can provide a
string
.
In the function signature we use
v …interface{}
to declare a parameter
v
which takes any number of values. These are received by
print()
as a sequence of values and the subsequent call to
Println(v…)
uses this same sequence as this is the sequence expected by
Println()
.
So why did we use
…interface{}
in defining our parameters instead of the more obvious
…string
? The
Println()
function is itself defined as
Println(…interface{})
so to provide a sequence of values en masse we likewise need to use
…interface{}
in the type signature of our function. Otherwise we’d have to create a
[]interface{}
(a
slice
of
interface{}
values, a concept we’ll cover in detail in a later chapter of my book) and copy each individual element into it before passing it into
Println()
.
Encapsulation
In this tutorial, we’ll for the most part be using Go’s primitive types and types defined in various standard packages without any comment on their structure; however, a key aspect of modern programming languages is the encapsulation of related data into structured types and Go supports this via the
struct
type. A
struct
describes an area of allocated memory which is subdivided into slots for holding named values, where each named value has its own type. A typical example of a
struct
in action would be Listing 17, which gives:
 1 package main
 2 import "fmt"
 3 type Message struct {
 4   X string
 5   y *string
 6 }
 7 func (v Message) Print() {
 8   if v.y != nil {
 9     fmt.Println(v.X, *v.y)
10   } else {
11     fmt.Println(v.X)
12   }
13 }
14 func (v *Message) Store(x, y string) {
15   v.X = x
16   v.y = &y
17 }
18 func main() {
19   m := &Message{}
20   m.Print()
21   m.Store("Hello", "world")
22   m.Print()
23 }
|
| Listing 17 |
  $ go run 17.go
  Hello world
Here we’ve defined a struct
Message
which contains two values:
X
and
y
. Go uses a very simple rule for deciding if an identifier is visible outside of the package in which it’s defined which applies to both package-level constants and variables, and
type
names, methods and fields. If the identifier starts with a capital letter it’s visible outside the package, otherwise it’s private to the package.
The Go language spec guarantees that all variables will be initialised to the zero value for their type. For a
struct
type this means that every field will be initialised to an appropriate zero value. Therefore when we declare a value of type
Message
the Go runtime will initialise all of its elements to their zero value (in this case a zero-length string and a nil pointer respectively), and likewise if we create a
Message
value using a literal
19 m := &Message{}
Having declared a
struct
type we can declare any number of
method
functions which will operate on this type. In this case we’ve introduced
Print()
which is called on a
Message
value to display it in the terminal, and
Store()
which is called on a pointer to a
Message
value to change its contents. The reason
Store()
applies to a pointer is that we want to be able to change the contents of the
Message
and have these changes persist. If we define the method to work directly on the value these changes won’t be propagated outside the method’s scope. To test this for yourself, make the following change to the program:
14 func (v Message) Store(x, y string) {
If you’re familiar with functional programming then the ability to use values immutably this way will doubtless spark all kinds of interesting ideas.
There’s another
struct
trick I want to show off before we move on and that’s
type embedding
using an anonymous field. Go’s design has upset quite a few people with an inheritance-based view of object orientation because it lacks inheritance; however, thanks to
type embedding
we’re able to compose types which act as proxies to the
methods
provided by anonymous fields. As with most things, an example (Listing 18) will make this much clearer.
 1 package main
 2 import "fmt"
 3 type HelloWorld struct {}
 4 func (h HelloWorld) String() string {
 5   return "Hello world"
 6 }
 7 type Message struct {
 8   HelloWorld
 9 }
10 func main() {
11   m := &Message{}
12   fmt.Println(m.HelloWorld.String())
13   fmt.Println(m.String())
14   fmt.Println(m)
15 }
|
| Listing 18 |
  $ go run 18.go
  Hello world
  Hello world
  Hello world
Here we’re declaring a type
HelloWorld
which in this case is just an empty
struct
, but which in reality could be any declared type.
HelloWorld
defines a
String()
method which can be called on any
HelloWorld
value. We then declare a type
Message
which embeds the
HelloWorld
type by defining an anonymous field of the
HelloWorld
type. Wherever we encounter a value of type
Message
and wish to call
String()
on its embedded
HelloWorld
value we can do so by calling
String()
directly on the value, calling
String()
on the
Message
value, or in this case by allowing
fmt.Println()
to match it with the
fmt.Stringer
interface.
Any declared type can be embedded, so in Listing 19, we’re going to base
HelloWorld
on the primitive
bool
boolean type to prove the point.
 1 package main
 2 import "fmt"
 3 type HelloWorld bool
 4 func (h HelloWorld) String() (r string) {
 5   if h {
 6     r = "Hello world"
 7   }
 8   return
 9 }
10 type Message struct {
11   HelloWorld
12 }
13 func main() {
14   m := &Message{ HelloWorld: true }
15   fmt.Println(m)
16   m.HelloWorld = false
17   fmt.Println(m)
18   m.HelloWorld = true
19   fmt.Println(m)
20 }
|
| Listing 19 |
In our final example (Listing 20) we’ve declared the
Hello
type and embedded it in
Message
, then we’ve implemented a new
String()
method which allows a
Message
value more control over how it’s printed.
 1 package main
 2 import "fmt"
 3 type Hello struct {}
 4 func (h Hello) String() string {
 5   return "Hello"
 6 }
 7 type Message struct {
 8   *Hello
 9   World string
10 }
11 func (v Message) String() (r string) {
12   if v.Hello == nil {
13     r = v.World
14   } else {
15     r = fmt.Sprintf("%v %v", v.Hello, v.World)
16   }
17   return
18 }
19 func main() {
20   m := &Message{}
21   fmt.Println(m)
22   m.Hello = new(Hello)
23   fmt.Println(m)
24   m.World = "world"
25   fmt.Println(m)
26 }
|
| Listing 20 |
  $ go run 20.go
  Hello
  Hello world
In all these examples we’ve made liberal use of the
*
and
&
operators. An explanation is in order.
Go is a systems programming language, and this means that a Go program has direct access to the memory of the platform it’s running on. This requires that Go has a means of referring to specific addresses in memory and of accessing their contents indirectly. The
&
operator is prepended to the name of a variable or to a value literal when we wish to discover its address in memory, which we refer to as a pointer. To do anything with the pointer returned by the
&
operator we need to be able to declare a pointer variable which we do by prepending a type name with the
*
operator. An example (Listing 21) will probably make this description somewhat clearer, and we get:
 1 package main
 2 import . "fmt"
 3 type Text string
 4 func main() {
 5   var name Text = "Ellie"
 6   var pointer_to_name *Text
 7   pointer_to_name = &name
 8   Printf("name = %v stored at %v\n", name,
     pointer_to_name)
 9   Printf("pointer_to_name references %v\n",
     *pointer_to_name)
10 }
|
| Listing 21 |
  $ go run 21.go
  name = Ellie stored at 0x208178170
  pointer_to_name references Ellie
Go allows user-defined types to declare methods on either a value type or a pointer to a value type . When methods operate on a value type the value manipulated remains immutable to the rest of the program (essentially the method operates on a copy of the value) whilst with a pointer to a value type any changes to the value are apparent throughout the program. This has far-reaching implications which we’ll explore in later chapters.
Generalisation
Encapsulation is of huge benefit when writing complex programs and it also enables one of the more powerful features of Go’s type system, the
interface
. An
interface
is similar to a
struct
in that it combines one or more elements but rather than defining a type in terms of the data items it contains, an
interface
defines it in terms of a set of method signatures which it must implement.
As none of the primitive types (
int
,
string
, etc.) have methods they match the empty
interface (interface{})
as do all other types, a property used frequently in Go programs to create generic containers.
Once declared, an interface can be used just like any other declared type, allowing functions and variables to operate with unknown types based solely on their required behaviour. Go’s type inference system will then recognise compliant values as instances of the interface, allowing us to write generalised code with little fuss.
In Listing 22, we’re going to introduce a simple
interface
(by far the most common kind) which matches any type with a
func String() string
method signature.
 1 package main
 2 import "fmt"
 3 type Stringer interface {
 4   String() string
 5 }
 6 type Hello struct {}
 7 func (h Hello) String() string {
 8   return "Hello"
 9 }
10 type World struct {}
11 func (w *World) String() string {
12   return "world"
13 }
14 type Message struct {
15   X Stringer
16   Y Stringer
17 }
18 func (v Message) String() (r string) {
19   switch {
20   case v.X == nil && v.Y == nil:
21   case v.X == nil:
22     r = v.Y.String()
23   case v.Y == nil:
24     r = v.X.String()
25   default:
26     r = fmt.Sprintf("%v %v", v.X, v.Y)
27   }
28   return
29 }
30 func main() {
31   m := &Message{}
32   fmt.Println(m)
33   m.X = new(Hello)
34   fmt.Println(m)
35   m.Y = new(World)
36   fmt.Println(m)
37   m.Y = m.X
38   fmt.Println(m)
39   m = &Message{ X: new(World), Y: new(Hello) }
40   fmt.Println(m)
41   m.X, m.Y = m.Y, m.X
42   fmt.Println(m)
43 }
|
| Listing 22 |
  $ go run 22.go
  Hello
  Hello world
  Hello Hello
  world Hello
  Hello world
This
interface
is copied directly from
fmt.Stringer
, so we can simplify our code a little by using that interface instead:
  11 type Message struct {
  12   X fmt.Stringer
  13   Y fmt.Stringer
  14 }
As Go is strongly typed
interface
values contain both a pointer to the value contained in the
interface
, and the
concrete
type of the stored value. This allows us to perform type assertions to confirm that the value inside an
interface
matches a particular concrete type (see Listing 23).
 1 package main
 2 import "fmt"
 3 type Hello struct {}
 4 func (h Hello) String() string {
 5   return "Hello"
 6 }
 7 type World struct {}
 8 func (w *World) String() string {
 9   return "world"
10 }
11 type Message struct {
12   X fmt.Stringer
13   Y fmt.Stringer
14 }
15 func (v Message) IsGreeting() (ok bool) {
16   if _, ok = v.X.(*Hello); !ok {
17     _, ok = v.Y.(*Hello)
18   }
19   return
20 }
21 func main() {
22   m := &Message{}
23   fmt.Println(m.IsGreeting())
24   m.X = new(Hello)
25   fmt.Println(m.IsGreeting())
26   m.Y = new(World)
27   fmt.Println(m.IsGreeting())
28   m.Y = m.X
29   fmt.Println(m.IsGreeting())
30   m = &Message{ X: new(World), Y: new(Hello) }
31   fmt.Println(m.IsGreeting())
32   m.X, m.Y = m.Y, m.X
33   fmt.Println(m.IsGreeting())
34 }
|
| Listing 23 |
  go run 23.go
  false
  true
  true
  true
  true
  true
Here we’ve replaced
Message
’s
String()
method with
IsGreeting()
, a predicate which uses a pair of
type assertions
to tell us whether or not one of
Message
’s data fields contains a value of concrete type
Hello
.
So far in these examples we’ve been using pointers to
Hello
and
World
so the
interface
variables are storing pointers to pointers to these values (i.e.
**Hello
and
**World
) rather than pointers to the values themselves (i.e.
*Hello
and
*World
). In the case of
World
we have to do this to comply with the
fmt.Stringer
interface because
String()
is defined for
*World
and if we modify
main
to assign a
World
value to either field (see Listing 24) we’ll get a compile-time error:
29 func main() {
30   m := &Message{}
31   fmt.Println(m.IsGreeting())
32   m.X = Hello{}
33   fmt.Println(m.IsGreeting())
34   m.X = new(Hello)
35   fmt.Println(m.IsGreeting())
36   m.X = World{}
37 }
|
| Listing 24 |
  $ go run 24.go
  # command-line-arguments
  ./24.go:36: cannot use World literal (type World)  as type fmt.Stringer in assignment:
  World does not implement fmt.Stringer (String  method has pointer receiver)
The final thing to mention about
interface
s is that they support embedding of other
interface
s. This allows us to compose a new, more restrictive
interface
based on one or more existing
interface
s. Rather than demonstrate this with an example, we’re going to look at code lifted directly from the standard
io
package which does this (Listing 25).
67 type Reader interface {
68   Read(p []byte) (n int, err error)
69 }
78 type Writer interface {
79   Write(p []byte) (n int, err error)
80 }
106 type ReadWriter interface {
107   Reader
108   Writer
109 }
|
| Listing 25 |
Here
io
is declaring three interfaces, the
Reader
and
Writer
, which are independent of each other, and the
ReadWriter
which combines both. Any time we declare a variable, field or function parameter in terms of a
ReaderWriter
, we know we can use both the
Read()
and
Write()
methods to manipulate it.
Startup
One of the less-discussed aspects of computer programs is the need to initialise many of them to a pre-determined state before they begin executing. Whilst this is probably the worst place to start discussing what to many people may appear to be advanced topics, one of my goals in this chapter is to cover all of the structural elements that we’ll meet when we examine more complex programs.
Every Go package may contain one or more
init()
functions specifying actions that should be taken during program initialisation. This is the one case I’m aware of where multiple declarations of the same identifier can occur without either resulting in a compilation error or the shadowing of a variable. In the following example we use the
init()
function to assign a value to our
world
variable (Listing 26).
 1 package main
 2 import . "fmt"
 3 const Hello = "hello"
 4 var world  string
 5 func init() {
 6   world = "world"
 7 }
 8 func main() {
 9   Println(Hello, world)
10 }
|
| Listing 26 |
However, the
init()
function can contain any valid Go code, allowing us to place the whole of our program in
init()
and leaving
main()
as a stub to convince the compiler that this is indeed a valid Go program (Listing 27).
 1 package main
 2 import . "fmt"
 3
 4 const Hello = "hello"
 5 var world  string
 6
 7 func init() {
 8   world = "world"
 9   Println(Hello, world)
10 }
11
12 func main() {}
|
| Listing 27 |
When there are multiple
init()
functions, the order in which they’re executed is indeterminate so in general it’s best not to do this unless you can be certain the
init()
functions don’t interact in any way. Listing 28 happens to work as expected on my development computer but an implementation of Go could just as easily arrange it to run in reverse order or even leave deciding the order of execution until runtime.
 1 package main
 2 import . "fmt"
 3 const Hello = "hello"
 4 var world  string
 5 func init() {
 6   Print(Hello, " ")
 7   world = "world"
 8 }
 9 func init() {
10   Printf("%v\n", world)
11 }
12 func main() {}
|
| Listing 28 |
HTTP
So far our treatment of Hello World has followed the traditional route of printing a preset message to the console. Anyone would think we were living in the fuddy-duddy mainframe era of the 1970s instead of the shiny 21st Century, when web and mobile applications rule the world.
Turning Hello World into a web application is surprisingly simple, as Listing 29 demonstrates.
 1 package main
 2 import (
 3   . "fmt"
 4   "net/http"
 5 )
 6 const MESSAGE = "hello world"
 7 const ADDRESS = ":1024"
 8 func main() {
 9   http.HandleFunc("/hello", Hello)
10   if e := http.ListenAndServe(ADDRESS, nil);
     e != nil {
11     Println(e)
12   }
13 }
14 func Hello(w http.ResponseWriter,
   r *http.Request) {
15   w.Header().Set("Content-Type", "text/plain")
16   Fprintf(w, MESSAGE)
17 }
|
| Listing 29 |
Our web server is now listening on localhost port 1024 (usually the first non-privileged port on most Unix-like operating systems) and if we visit the url http://localhost:1024/hello with a web browser our server will return Hello World in the response body.
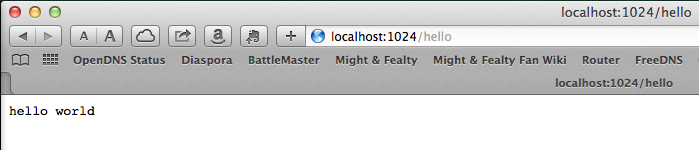
|
| Figure 1 |
The first thing to note is that the
net/http
package provides a fully-functional web server which requires very little configuration. All we have to do to get our content to the browser is define a
handler
, which in this case is a function to call whenever an
http.Request
is received, and then launch a server to listen on the desired address with
http.ListenAndServe()
.
http.ListenAndServe
returns an error if it’s unable to launch the server for some reason, which in this case we print to the console.
We’re going to import the
net/http
package into the current namespace and assume our code won’t encounter any runtime errors to make the simplicity even more apparent (Listing 30). If you run into any problems whilst trying the examples which follow, reinserting the
if
statement will allow you to figure out what’s going on.
 1 package main
 2 import (
 3   . "fmt"
 4   . "net/http"
 5 )
 6 const MESSAGE = "hello world"
 7 const ADDRESS = ":1024"
 8 func main() {
 9   HandleFunc("/hello", Hello)
10   ListenAndServe(ADDRESS, nil)
11 }
12 func Hello(w ResponseWriter, r *Request) {
13   w.Header().Set("Content-Type", "text/plain")
14   Fprintf(w, MESSAGE)
15 }
|
| Listing 30 |
HandleFunc()
registers a URL in the web server as the trigger for a function, so when a web request targets the URL the associated function will be executed to generate the result. The specified handler function is passed both a
ResponseWriter
to send output to the web client and the
Request
which is being replied to. The
ResponseWriter
is a file handle so we can use the
fmt.Fprint()
family of file-writing functions to create the response body.
Finally we launch the server using
ListenAndServe()
, which will block for as long as the server is active, returning an error if there is one to report.
In this example (Listing 30) I’ve declared a function
Hello
and by referring to this in the call to
HandleFunc()
this becomes the function which is registered. However, Go also allows us to define functions anonymously where we wish to use a function value, as demonstrated in the following variation on our theme.
Functions are first-class values in Go and in Listing 31
HandleFunc()
is passed an anonymous function value which is created at runtime.
 1 package main
 2 import (
 3   . "fmt"
 4   . "net/http"
 5 )
 6 const MESSAGE = "hello world"
 7 const ADDRESS = ":1024"
 8 func main() {
 9   HandleFunc("/hello", func(w ResponseWriter,
     r *Request) {
10     w.Header().Set("Content-Type",
       "text/plain")
11     Fprintf(w, MESSAGE)
12   })
13   ListenAndServe(ADDRESS, nil)
14 }
|
| Listing 31 |
This value is a closure so it can also access variables in the lexical scope in which it’s defined. We’ll treat closures in greater depth later in my book, but for now Listing 32 is an example which demonstrates their basic premise by defining a variable
message
s in
main()
and then accessing it from within the anonymous function.
 1 package main
 2 import (
 3   . "fmt"
 4   . "net/http"
 5 )
 6 const ADDRESS = ":1024"
 7 func main() {
 8   message := "hello world"
 9   HandleFunc("/hello", func(w ResponseWriter,
     r *Request) {
10     w.Header().Set("Content-Type",
       "text/plain")
11     Fprintf(w, message)
12   })
13   ListenAndServe(ADDRESS, nil)
14 }
|
| Listing 32 |
This is only a very brief taster of what’s possible using
net/http
so we’ll conclude by serving our hello world web application over an SSL connection (see Listing 33).
 1 package main
 2 import (
 3   . "fmt"
 4   . "net/http"
 5 )
 6 const SECURE_ADDRESS = ":1025"
 7 func main() {
 8   message := "hello world"
 9   HandleFunc("/hello", func(w ResponseWriter,
     r *Request) {
10     w.Header().Set("Content-Type",
       "text/plain")
11     Fprintf(w, message)
12   })
13   ListenAndServeTLS(SECURE_ADDRESS, "cert.pem",
     "key.pem", nil)
|
| Listing 33 |
Before we run this program we first need to generate a certificate and a public key, which we can do using
crypto/tls/generate_cert.go
in the standard package library.
  $ go run $GOROOT/src/pkg/crypto/tls/  generate_cert.go -ca=true -host="localhost"
  2014/05/16 20:41:53 written cert.pem
  2014/05/16 20:41:53 written key.pem
  $ go run 33.go

|
| Figure 2 |
This is a self-signed certificate, and not all modern web browsers like these. Firefox will refuse to connect on the grounds the certificate is inadequate and not being a Firefox user I’ve not devoted much effort to solving this. Meanwhile both Chrome and Safari will prompt the user to confirm the certificate is trusted. I have no idea how Internet Explorer behaves. For production applications you’ll need a certificate from a recognised Certificate Authority. Traditionally this would be purchased from a company such as Thawte for a fixed period but with the increasing emphasis on securing the web a number of major networking companies have banded together to launch Let’s Encrypt. It’s a free CA issuing short-duration certificates for SSL/TLS with support for automated renewal.
If you’re anything like me (and you have my sympathy if you are) then the next thought to idle through your mind will be a fairly obvious question: given that we can serve our content over both HTTP and HTTPS connections, how do we do both from the same program?
To answer this we have to know a little – but not a lot – about how to model concurrency in a Go program. The go keyword marks a goroutine which is a lightweight thread scheduled by the Go runtime. How this is implemented under the hood doesn’t matter, all we need to know is that when a goroutine is launched it takes a function call and creates a separate thread of execution for it. In Listing 34, we’re going to launch a goroutine to run the HTTP server then run the HTTPS server in the main flow of execution.
 1 package main
 2 import (
 3   . "fmt"
 4   . "net/http"
 5 )
 6 const ADDRESS = ":1024"
 7 const SECURE_ADDRESS = ":1025"
 8 func main() {
 9   message := "hello world"
10   HandleFunc("/hello", func(w ResponseWriter,
     r *Request) {
11     w.Header().Set("Content-Type",
       "text/plain")
12     Fprintf(w, message)
13   })
14   go func() {
15     ListenAndServe(ADDRESS, nil)
16   }()
17   ListenAndServeTLS(SECURE_ADDRESS, "cert.pem",
     "key.pem", nil)
18 }
|
| Listing 34 |
When I first wrote this code it actually used two goroutines, one for each server. Unfortunately no matter how busy any particular goroutine is, when the
main()
function returns our program will exit and our web servers will terminate. So I tried the primitive approach we all know and love from C (see Listing 35).
 8 func main() {
 9   message := "hello world"
10   HandleFunc("/hello", func(w ResponseWriter,
     r *Request) {
11     w.Header().Set("Content-Type",
       "text/plain")
12     Fprintf(w, message)
13   })
14   go func() {
15     ListenAndServe(ADDRESS, nil)
16   }()
17   go func() {
18     ListenAndServeTLS(SECURE_ADDRESS,
       "cert.pem", "key.pem", nil)
19   }()
20   for {}
21 }
|
| Listing 35 |
Here we’re using an infinite
for
loop to prevent program termination: it’s inelegant, but this is a small program and dirty hacks have their appeal. Whilst semantically correct this unfortunately doesn’t work either because of the way goroutines are scheduled: the infinite loop can potentially starve the thread scheduler and prevent the other goroutines from running.
  $ go version
  go version go1.3 darwin/amd64
In any event an infinite loop is a nasty, unnecessary hack as Go allows concurrent elements of a program to communicate with each other via channels , allowing us to rewrite our code as in Listing 36.
 1 package main
 2 import (
 3   . "fmt"
 4   . "net/http"
 5 )
 7 const ADDRESS = ":1024"
 8 const SECURE_ADDRESS = ":1025"
 9 func main() {
10   message := "hello world"
11   HandleFunc("/hello", func(w ResponseWriter,
     r *Request) {
12     w.Header().Set("Content-Type",
       "text/plain")
13     Fprintf(w, message)
14   })
15   done := make(chan bool)
16   go func() {
17     ListenAndServe(ADDRESS, nil)
18     done <- true
19   }()
20   ListenAndServeTLS(SECURE_ADDRESS, "cert.pem",
     "key.pem", nil)
21   <- done
22 }
|
| Listing 36 |
For the next pair of examples we’re going to use two separate goroutines to run our HTTP and HTTPS servers, yet again coordinating program termination with a shared channel. In Listing 37, we’ll launch both of the goroutines from the
main()
function, which is a fairly typical code pattern.
 1 package main
 2 import (
 3   . "fmt"
 4   . "net/http"
 5 )
 6 const ADDRESS = ":1024"
 7 const SECURE_ADDRESS = ":1025"
 8 func main() {
 9   message := "hello world"
10   HandleFunc("/hello", func(w ResponseWriter,
     r *Request) {
11     w.Header().Set("Content-Type",
       "text/plain")
12     Fprintf(w, message)
13   })
14   done := make(chan bool)
15   go func() {
16     ListenAndServe(ADDRESS, nil)
17     done <- true
18   }()
19   go func () {
20     ListenAndServeTLS(SECURE_ADDRESS,
       "cert.pem", "key.pem", nil)
21     done <- true
22   }()
23   <- done
24   <- done
25 }
|
| Listing 37 |
For our second deviation (Listing 38), we’re going to launch a goroutine from
main()
which will run our HTTPS server and this will launch the second goroutine which manages our HTTP server.
 1 package main
 2 import (
 3   . "fmt"
 4   . "net/http"
 5 )
 6 const ADDRESS = ":1024"
 7 const SECURE_ADDRESS = ":1025"
 8 func main() {
 9   message := "hello world"
10   HandleFunc("/hello", func(w ResponseWriter,
     r *Request) {
11     w.Header().Set("Content-Type",
       "text/plain")
12     Fprintf(w, message)
13   })
14   done := make(chan bool)
15   go func () {
16     go func() {
17       ListenAndServe(ADDRESS, nil)
18       done <- true
19     }()
20     ListenAndServeTLS(SECURE_ADDRESS,
       "cert.pem", "key.pem", nil)
21     done <- true
22   }()
23   <- done
24   <- done
25 }
|
| Listing 38 |
There’s a certain amount of fragile repetition in this code as we have to remember to explicitly create a channel, and then to send and receive on it multiple times to coordinate execution. As Go provides first-order functions (i.e. allows us to refer to functions the same way we refer to data, assigning instances of them to variables and passing them around as parameters to other functions), we can refactor the server launch code as in Listing 39.
 1 package main
 2 import (
 3   . "fmt"
 4   . "net/http"
 5 )
 6 const ADDRESS = ":1024"
 7 const SECURE_ADDRESS = ":1025"
 8 func main() {
 9   message := "hello world"
10   HandleFunc("/hello", func(w ResponseWriter,
     r *Request) {
11     w.Header().Set("Content-Type",
       "text/plain")
12     Fprintf(w, message)
13   })
14   Spawn(
15     func() { ListenAndServeTLS(SECURE_ADDRESS,
       "cert.pem", "key.pem", nil) },
16   func() { ListenAndServe(ADDRESS, nil) },
17     )
18 }
19 func Spawn(f ...func()) {
20   done := make(chan bool)
21   for _, s := range f {
22     go func() {
23       s()
24       done <- true
25     }()
26   }
27   for l := len(f); l > 0; l-- {
28     <- done
29   }
30 }
|
| Listing 39 |
However, this doesn’t work as expected, so let’s see if we can get any further insight
 $ go vet 39.go
 39.go:23: range variable s captured by func literal
 exit status 1
Running
go
with the
vet
command runs a set of heuristics against our source code to check for common errors which wouldn’t be caught during compilation. In this case we’re being warned about this code
  21 for _, s := range f {
  22   go func() {
  23     s()
  24     done <- true
  25   }()
  26 }
Here we’re using a closure so it refers to the variable
s
in the
for
...
range
statement, and as the value of
s
changes on each successive iteration, so this is reflected in the call
s()
.
To demonstrate this, we’ll try a variant where we introduce a delay on each loop iteration much greater than the time taken to launch the goroutine (see Listing 40).
 1 package main
 2 import (
 3   . "fmt"
 4   . "net/http"
 5   "time"
 6 )
 7 const ADDRESS = ":1024"
 8 const SECURE_ADDRESS = ":1025"
 9 func main() {
10   message := "hello world"
11   HandleFunc("/hello", func(w ResponseWriter,
     r *Request) {
12     w.Header().Set("Content-Type",
       "text/plain")
13     Fprintf(w, message)
14   })
15   Spawn(
16     func() { ListenAndServeTLS(SECURE_ADDRESS,
       "cert.pem", "key.pem", nil) },
17     func() { ListenAndServe(ADDRESS, nil) },
18   )
19 }
20 func Spawn(f ...func()) {
21   done := make(chan bool)
22   for _, s := range f {
23     go func() {
24       s()
25       done <- true
26     }()
27     time.Sleep(time.Second)
28   }
29   for l := len(f); l > 0; l-- {
30     <- done
31   }
32 }
|
| Listing 40 |
When we run this we get the behaviour we expect with both HTTP and HTTPS servers running on their respective ports and responding to browser traffic. However, this is hardly an elegant or practical solution and there’s a much better way of achieving the same effect (Listing 41).
26   for _, s := range f {
27     go func(server func()) {
28       server()
29       done <- true
30     }(s)
31   }
|
| Listing 41 |
By accepting the parameter
server
to the goroutine’s closure we can pass in the value of
s
and capture it so that on successive iterations of the range our goroutines use the correct value.
Spawn()
is an example of how powerful Go’s support for first-class functions can be, allowing us to run any arbitrary piece of code and wait for it to signal completion. It’s also a
variadic
function, taking as many or as few functions as desired and setting each of them up correctly.
If we now reach for the standard library we discover that another alternative is to use a
sync.WaitGroup
to keep track of how many active goroutines we have in our program and only terminate the program when they’ve all completed their work. Yet again this allows us to run both servers in separate goroutines and manage termination correctly. (See Listing 42.)
 1 package main
 2 import (
 3   . "fmt"
 4   . "net/http"
 5   "sync"
 6 )
 7 const ADDRESS = ":1024"
 8 const SECURE_ADDRESS = ":1025"
 9 func main() {
10   message := "hello world"
11   HandleFunc("/hello", func(w ResponseWriter,
     r *Request) {
12     w.Header().Set("Content-Type",
       "text/plain")
13     Fprintf(w, message)
14   })
15   var servers sync.WaitGroup
16   servers.Add(1)
17   go func() {
18     defer servers.Done()
19     ListenAndServe(ADDRESS, nil)
20   }()
21   servers.Add(1)
22   go func() {
23     defer servers.Done()
24     ListenAndServeTLS(SECURE_ADDRESS,
       "cert.pem", "key.pem", nil)
25   }()
26   servers.Wait()
27 }
|
| Listing 42 |
As there’s a certain amount of redundancy in this, let’s refactor a little by packaging server initiation into a new
Launch()
function.
Launch()
takes a parameter-less function and wraps this in a
closure
which will be launched as a goroutine in a separate thread of execution. Our
sync.WaitGroup
variable servers has been turned into a global variable to simplify the function signature of
Launch()
. When we call
Launch()
we’re freed from the need to manually increment servers prior to goroutine startup, and we use a defer statement to automatically call
servers.Done()
when the goroutine terminates even in the event that the goroutine crashes. See Listing 43.
 1 package main
 2 import (
 3   . "fmt"
 4   . "net/http"
 5   "sync"
 6 )
 7 const ADDRESS = ":1024"
 8 const SECURE_ADDRESS = ":1025"
 9
10 var servers sync.WaitGroup
11 func main() {
12   message := "hello world"
13   HandleFunc("/hello", func(w ResponseWriter,
     r *Request) {
14     w.Header().Set("Content-Type",
       "text/plain")
15     Fprintf(w, message)
16   })
17   Launch(func() {
18     ListenAndServe(ADDRESS, nil)
19   })
20   Launch(func() {
21     ListenAndServeTLS(SECURE_ADDRESS,
       "cert.pem", "key.pem", nil)
22   })
23   servers.Wait()
24 }
25 func Launch(f func()) {
26   servers.Add(1)
27   go func() {
28     defer servers.Done()
29     f()
30   }()
31 }
|
| Listing 43 |
|
This is an extract from A Go Developer’s Notebook, a living eBook about Go and programming. Living eBooks are purchased once and freely updated when the author has something new to say. You can purchase your copy at http://leanpub.com/GoNotebook |